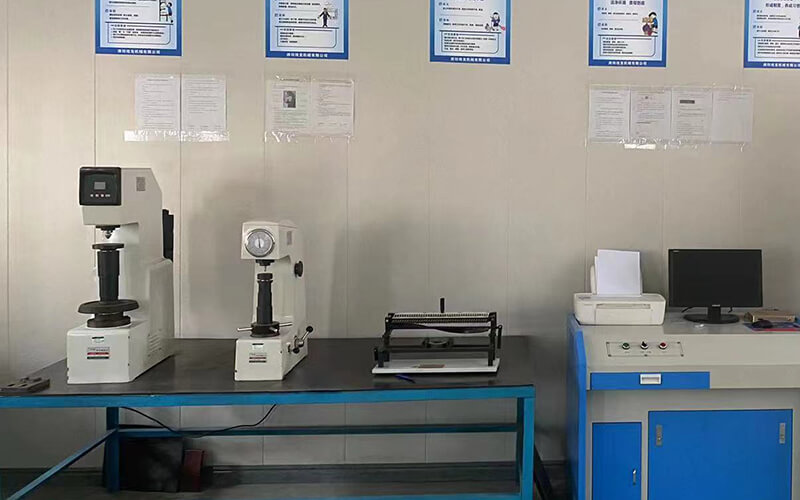
Rockwell hardness (HR)
Use a diamond cone (HRC) or hardened (tungsten) steel ball indenter (HRB, etc.) to press into the surface of the material to be tested with a preload of 10kgf and the main test force of 60, 100, or 150kgf.
Surface Rockwell Hardness (HR)
According to the set scale, a diamond cone or hardened (tungsten) steel ball indenter is pressed into the surface of the material to be tested. Surface Rockwell measurements are applied with smaller force values and produce shallower indentations, and are mostly used in relatively brittle and thin materials.
The preload is 3kgf and the main test force is 15, 30, or 45kgf.
Vickers hardness (HV)
With a test force of 1-120kgf, press a square-cone diamond indenter with an included angle of 136° to the surface of the material to be tested.
The indentation is observed and measured by video using a microscope or a USB camera.
Micro Vickers Hardness (HV)
Usually, with a test force not exceeding 1kgf, a square conical diamond indenter with an included angle of 136° relative to the surface is pressed into the surface of the material to be tested.
The indentation is visualized and measured using a precision microscope or a high-resolution USB camera.
A magnification of 600x is the most common, and a magnification of 1000x is becoming more widely used.
Knoop hardness (HK)
Usually, with a test force not exceeding 1kgf, the elongated diamond cone is pressed into the surface of the material to be tested.
The indentation is visualized and measured using a precision microscope or a high-resolution USB camera.
A magnification of 600x is the most common.
Brinell hardness (HB)
With a test force of 1 – 3000kgf, press a cemented carbide ball or a carbide ball with a diameter of 1, 2.5, 5, or 10mm into the surface of the material to be tested.
Relatively large indentations should be video-observed and measured with a microscope or a USB camera.
Leeb hardness (HL) (rebound method)
Portable hardness test. It uses a certain mass of impact body equipped with a tungsten carbide ball head to impact the surface of the test piece under the action of a certain spring force. This impact force causes plastic deformation on the surface of the tested material, forming an indentation. The impact body loses its original velocity (or energy).
Therefore, the softer the material being tested, the more velocity the impact body loses during rebound. Leeb hardness can be applied to a wide variety of parts with few test requirements to follow.
Ultrasonic Hardness Testing (UCI)
Portable hardness test. A Vickers-shaped diamond indenter is fixed on a vibrating rod, and a certain force is applied to the surface of the material to be tested, and then its damping effect is analyzed according to ultrasonic vibration, thereby measuring the hardness of the material.
Ultrasonic hardness testing is mostly used for small, thin parts that cannot be tested by a rebound hardness tester.
Shore hardness (SHORE)
Portable (rubber/plastic) hardness testing. Shore hardness is a steel indenter with a certain shape, which is pressed vertically into the surface of the sample under the action of the test force. When the surface of the indenter is completely attached to the surface of the sample, the tip of the indenter has a certain extension relative to the plane of the indenter. The exit length (that is, the depth of the indentation needle into the object to be measured), and the Shore hardness is expressed by the value of this length.
The indenter is connected to a linear measuring device, and the measured indentation depth value is then converted into a Shore hardness value by a mechanical or electronic system. The deeper the indentation, the softer the material.
IRHD (International Rubber Hardness)
According to the depth of the ball indenter into the material under test, to measure the resistance of the elastic material or rubber to the indenter. Apply an initial contact force on the 1, 2.5, or 5mm ball indenter and set the indentation depth to zero. Then increase the force value to the specified total load, then measure the depth value of the material indentation. The IRHD value is related to the depth of the indenter. This measurement method is often used to test smaller components and O-rings.
Webster hardness
Portable hardness test.
Place the material to be tested between the table and the penetrator. Then apply pressure to the handle until you feel that you have reached the bottom, and the dial indicator will read. There are different types of indenters for Webster hardness, with different force settings for different materials.
Uncommon hardness scales
The following hardness testing methods are not commonly used or have been replaced by other methods:
• HM Martens Hardness (Indentation Test Device, formerly HU – Universal Hardness)
• H ball indentation hardness
• HVT modified Vickers hardness test method, depth measurement
• HBT modified Brinell hardness test method, depth measurement
• BARCOL – indentation hardness
Similar Articles:
Recent Articles:
- Casting technical requirements and analysis of common problems of steel castings
- What is the role of Mo in high manganese steel casting production?
- What effect does carbon have on cast steel and iron during smelting?
- Prevention and Analysis of Stainless Steel Casting Defects
- Causes of cracks in steel castings

